
Process
The medium I use to express the beauty I see in the mountains is serigraphy, also known as screen printing. Serigraphy is a print-making technique using a fine mesh fabric stretched over a wooden or metal frame (a screen) to transfer ink onto a surface below. To print a design, a stencil is attached to the screen to block off nonprinting areas. My serigraph prints have multiple layers of color and each requires a separate stencil. Stencils can be made and applied in a variety of ways. However, unlike many screen printers, I do not use a photo-sensitive emulsion and instead opt to cut my stencils by hand.
All of my serigraph prints are printed one color at a time by hand — no mechanized processes are used in the printing — in a limited number, single-run edition (200 or fewer prints).
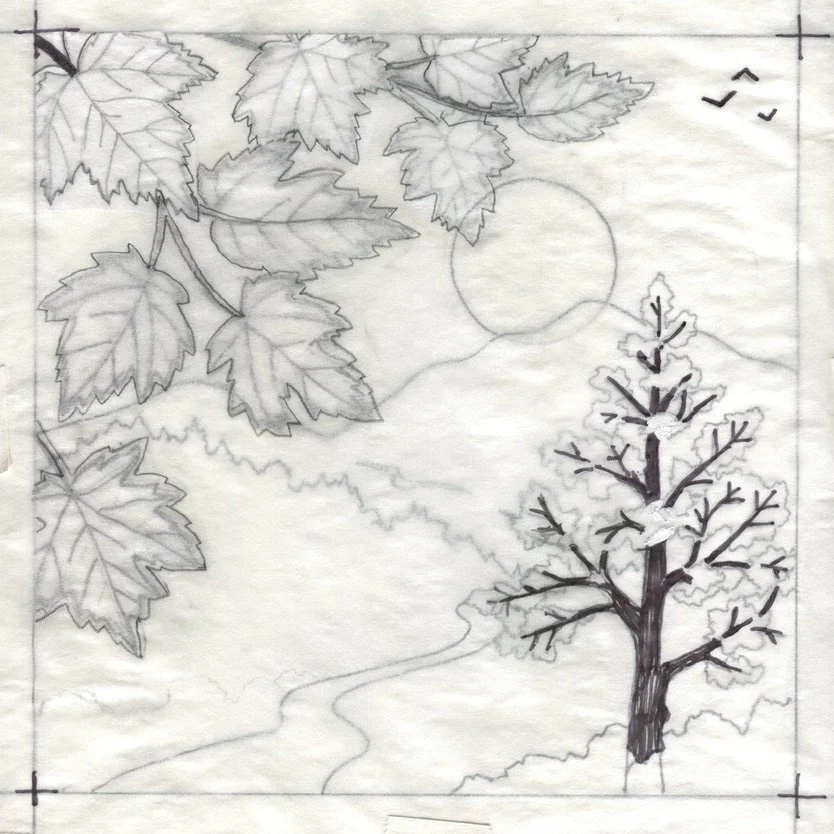
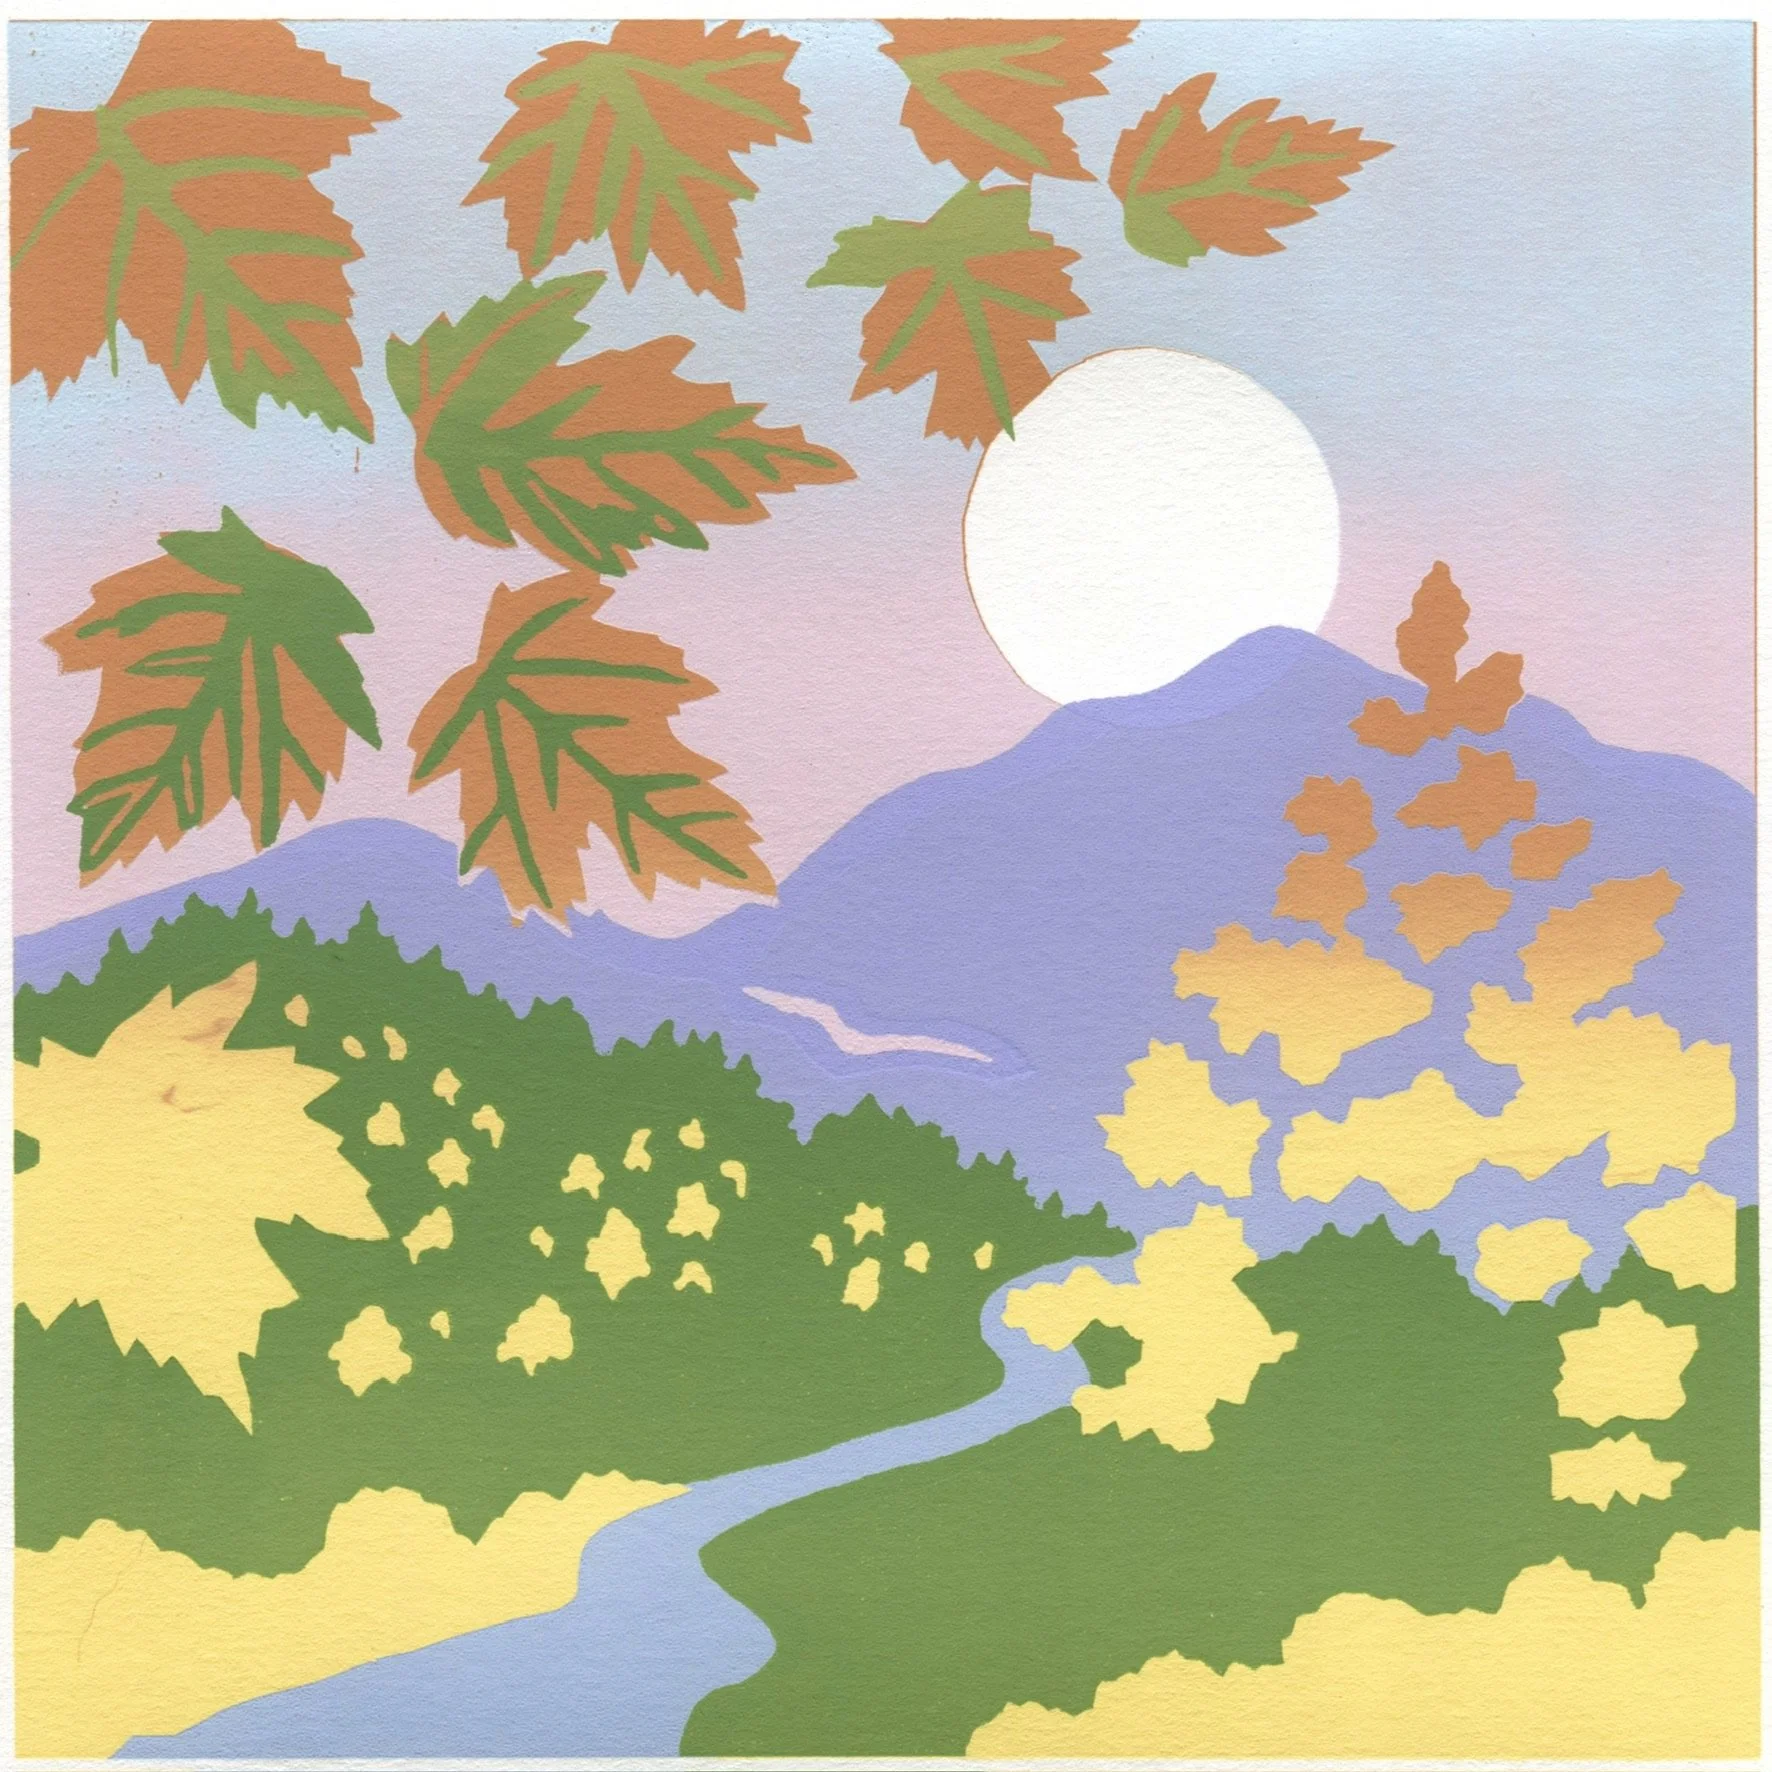
Master Design
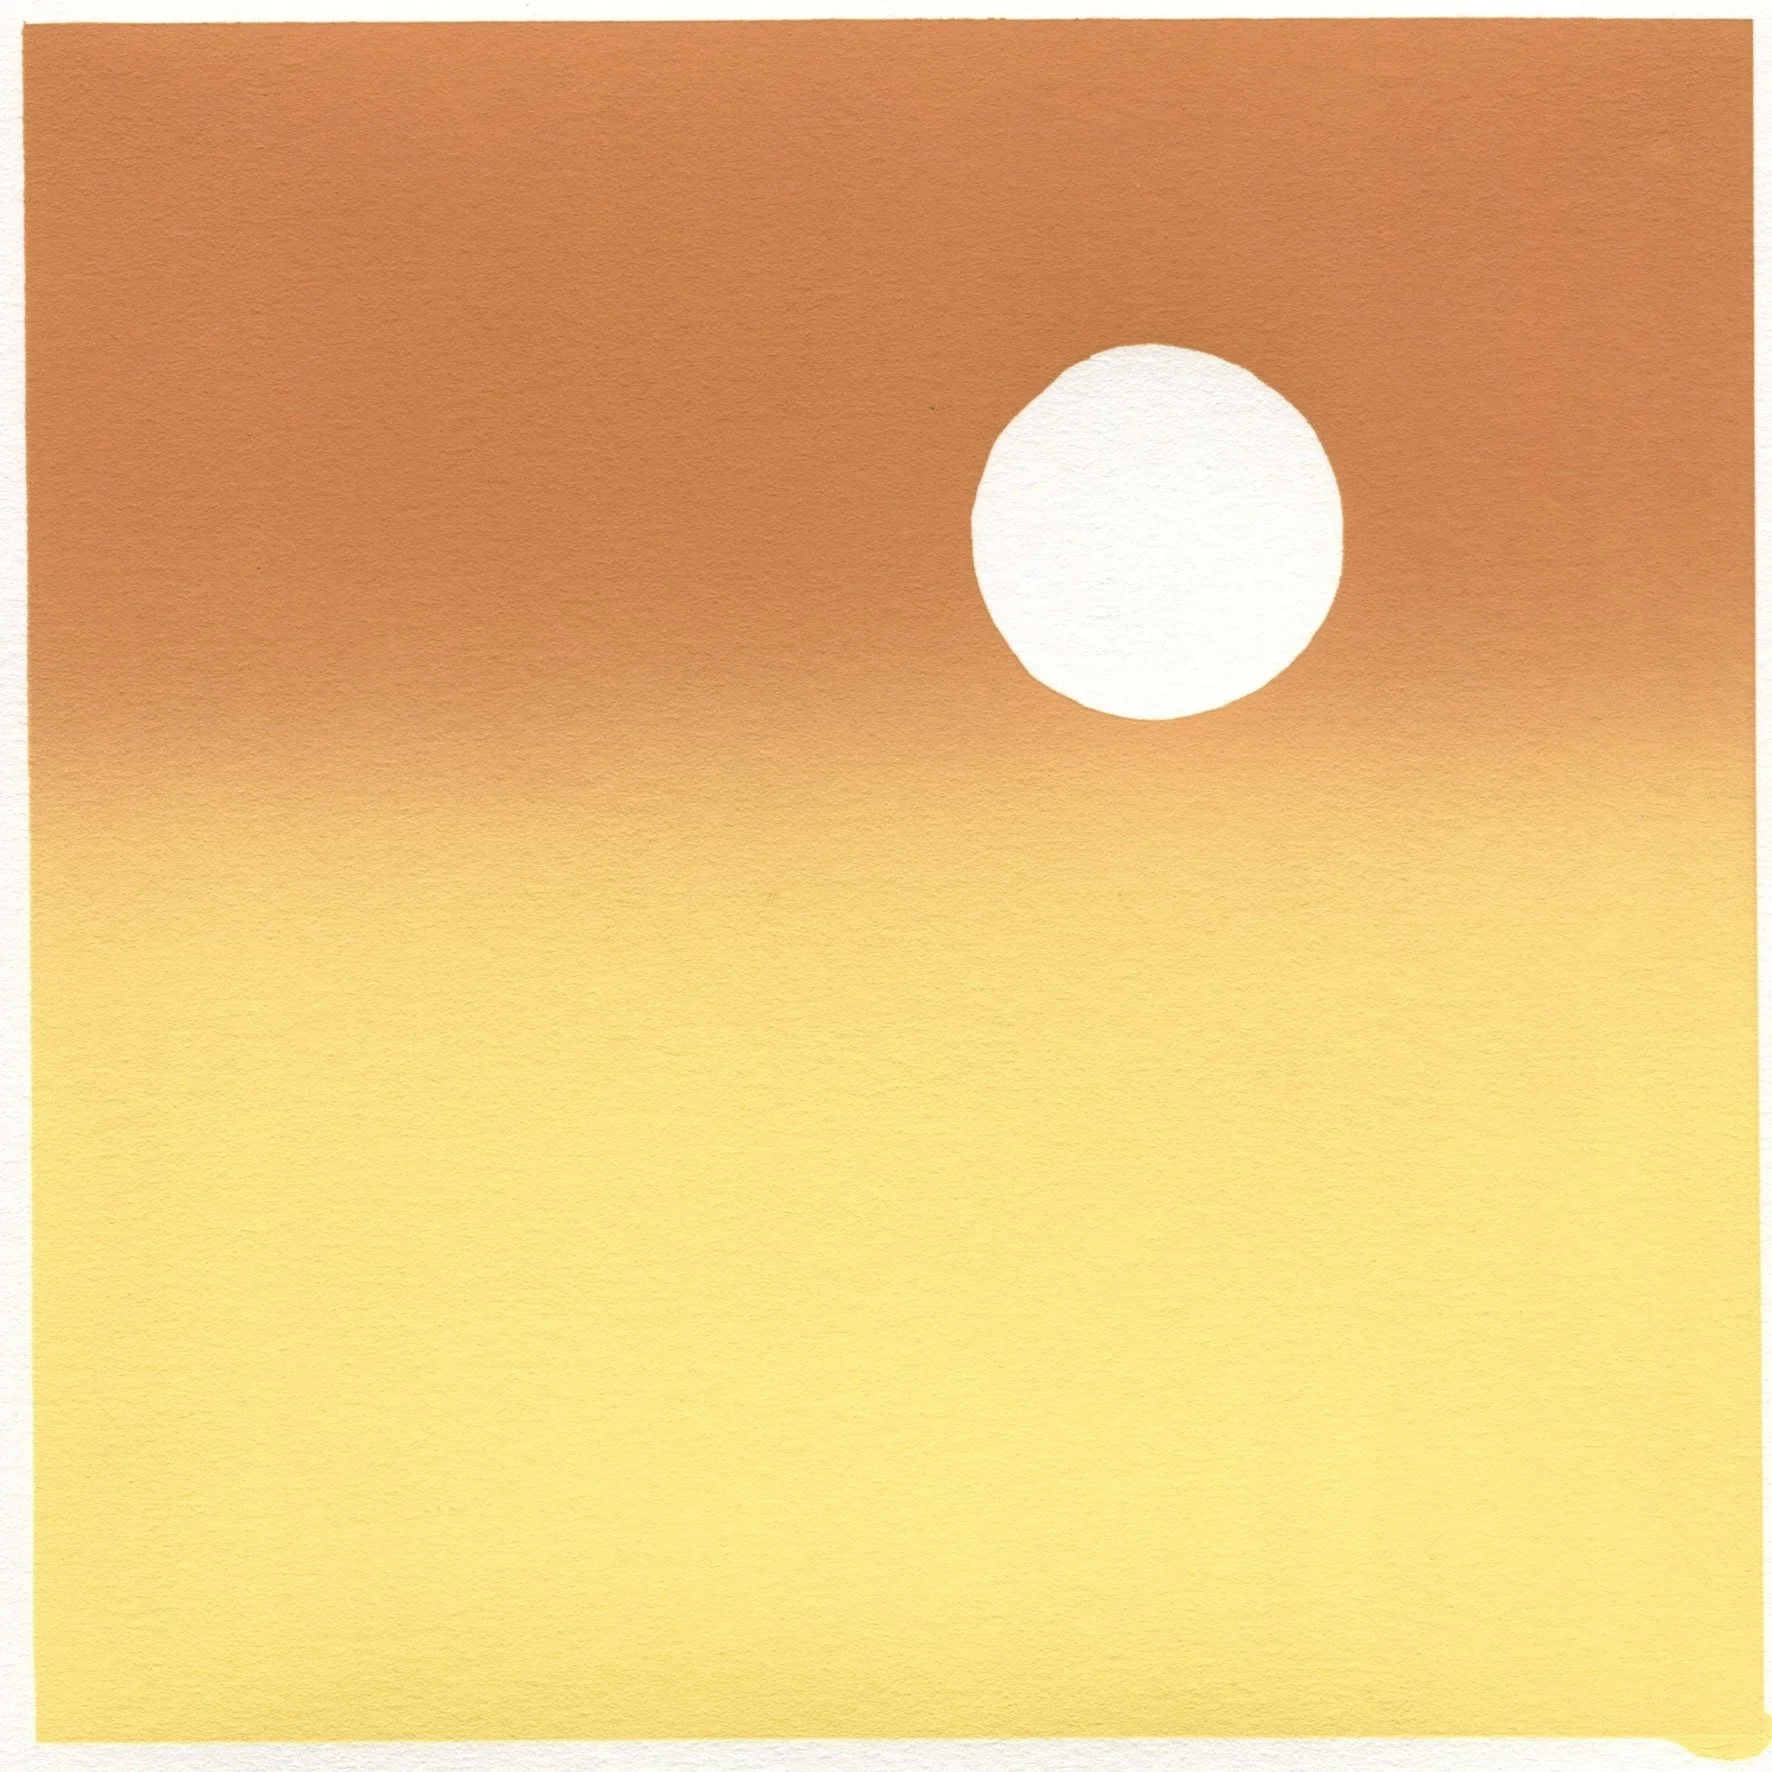
First Color
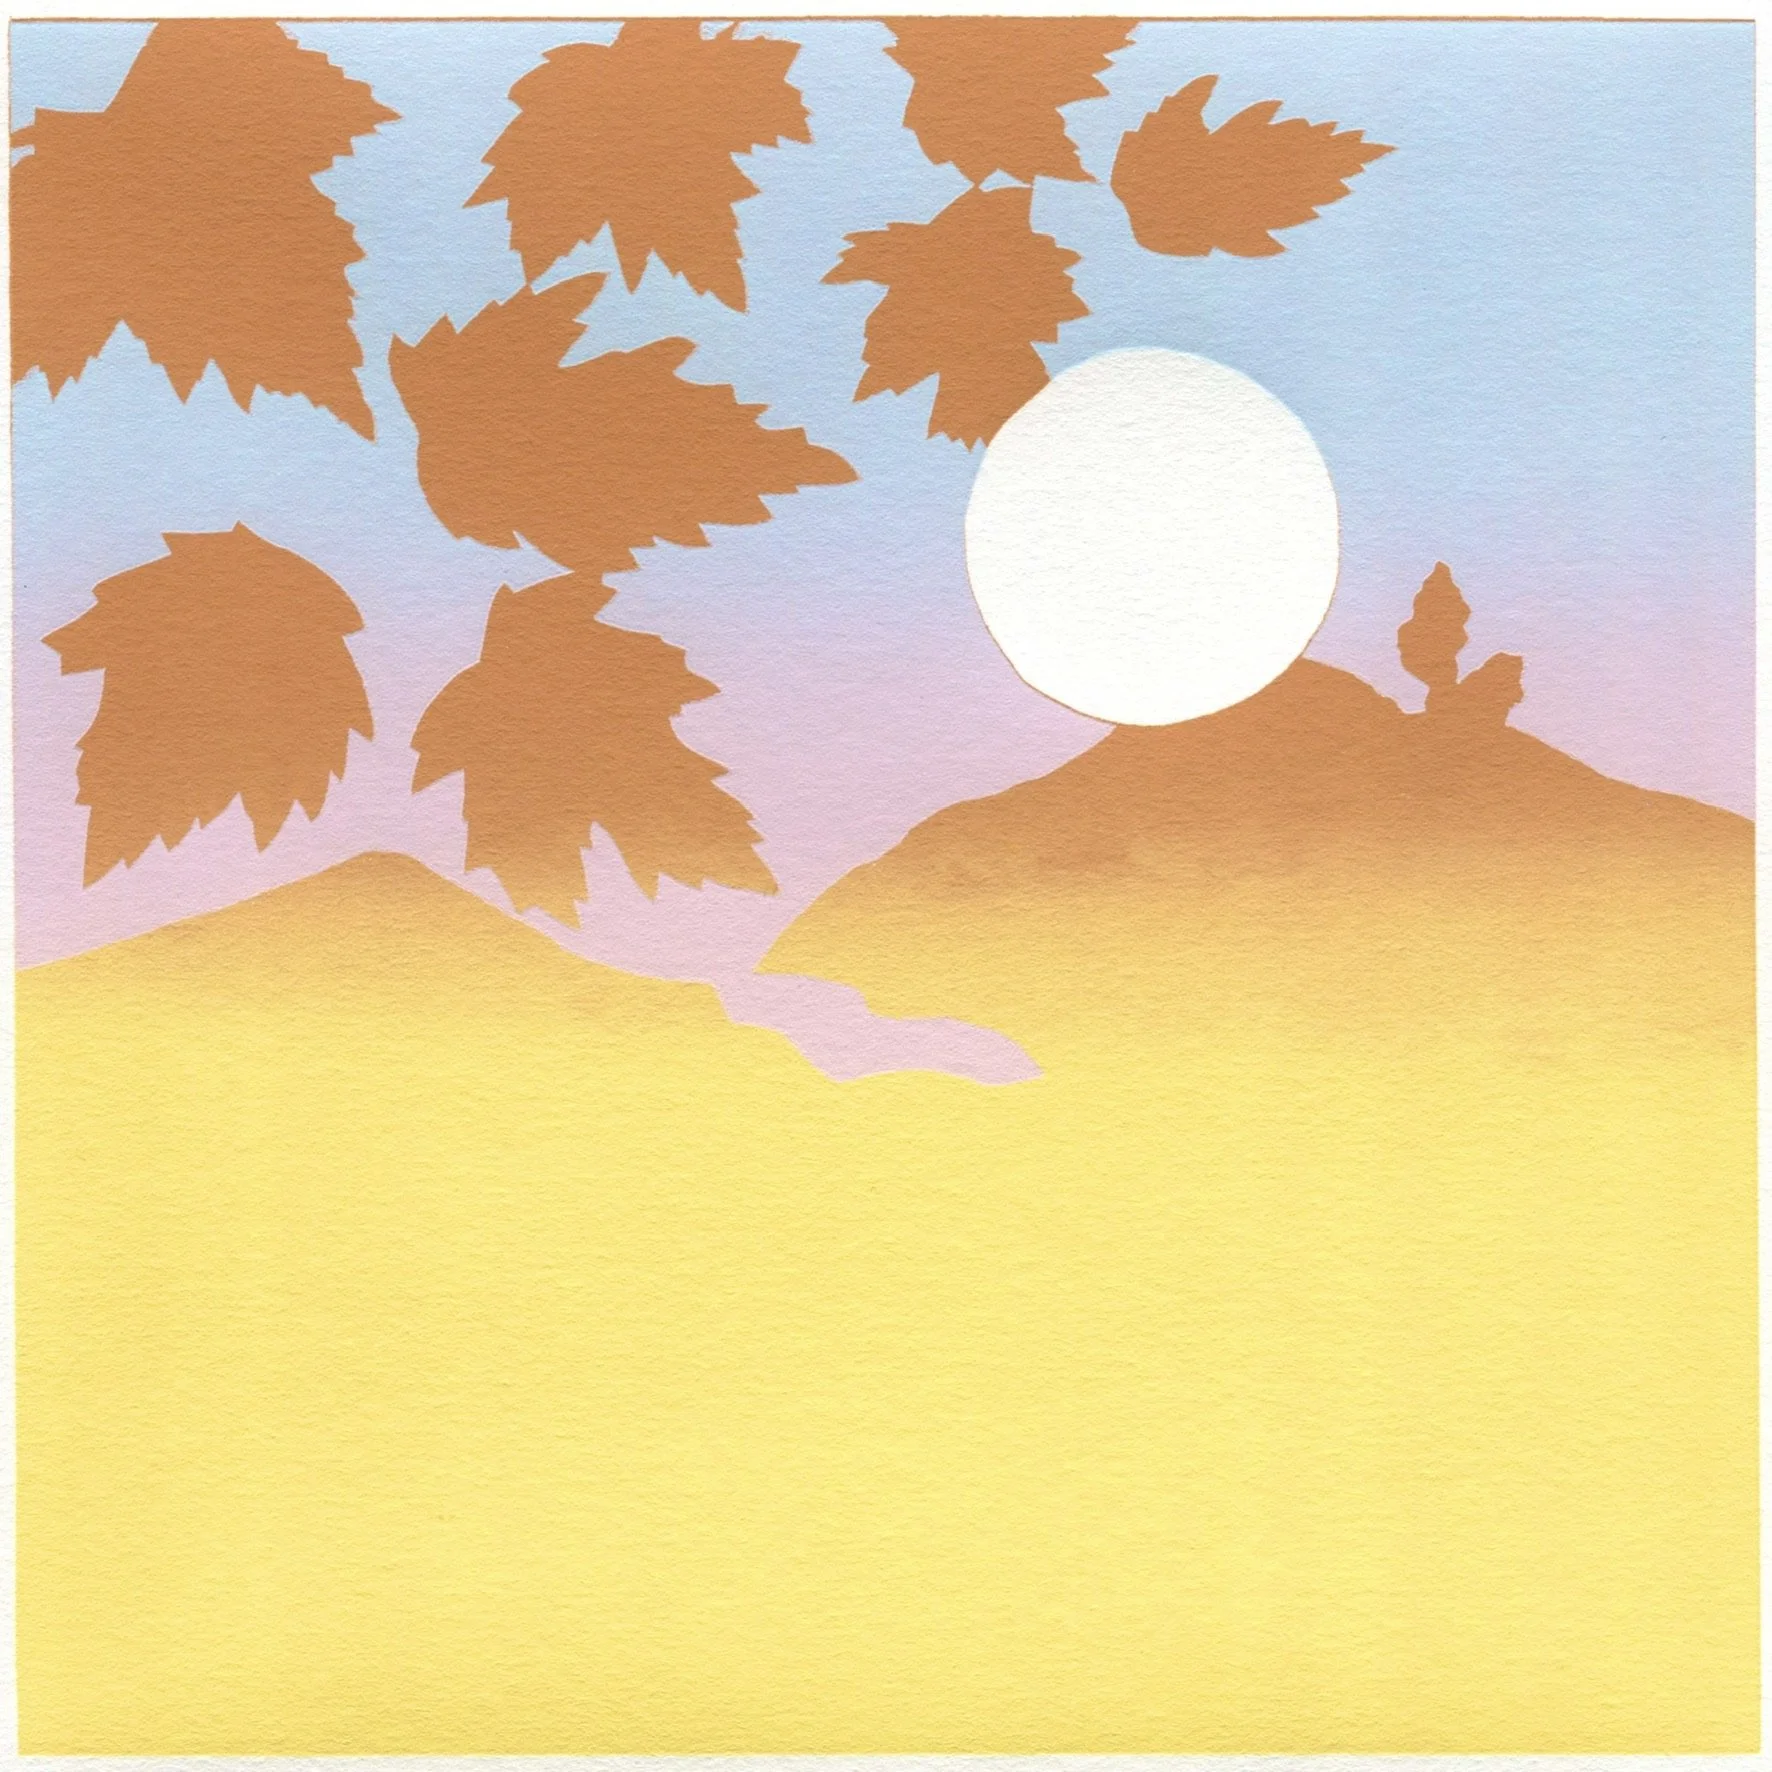
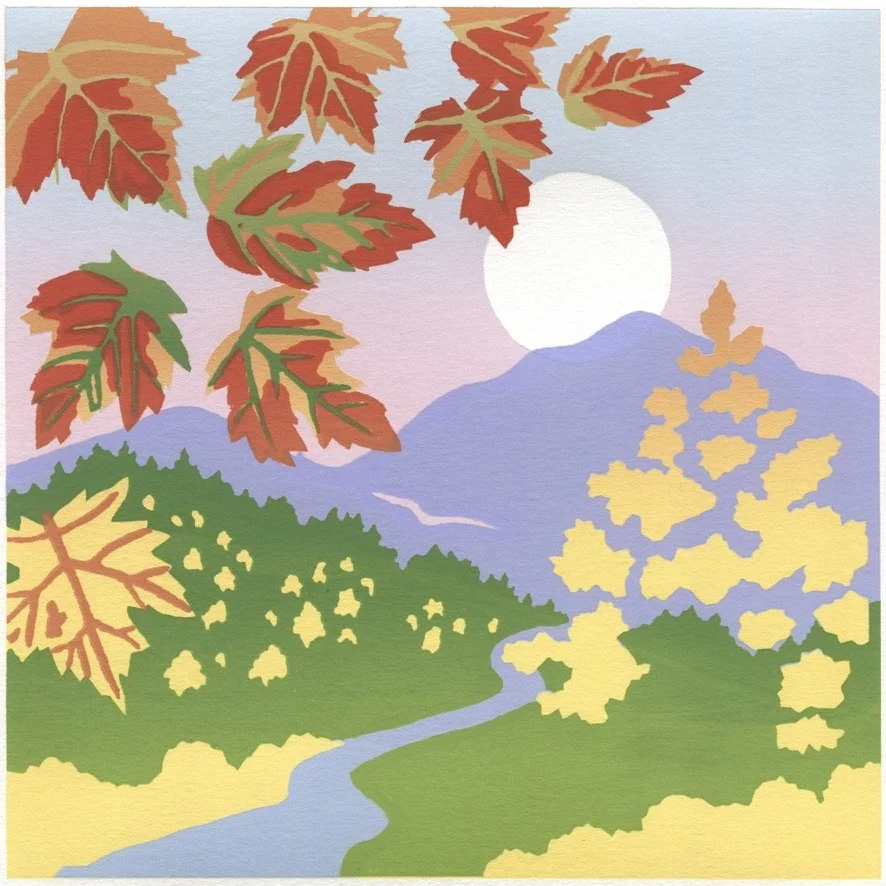
Second Color
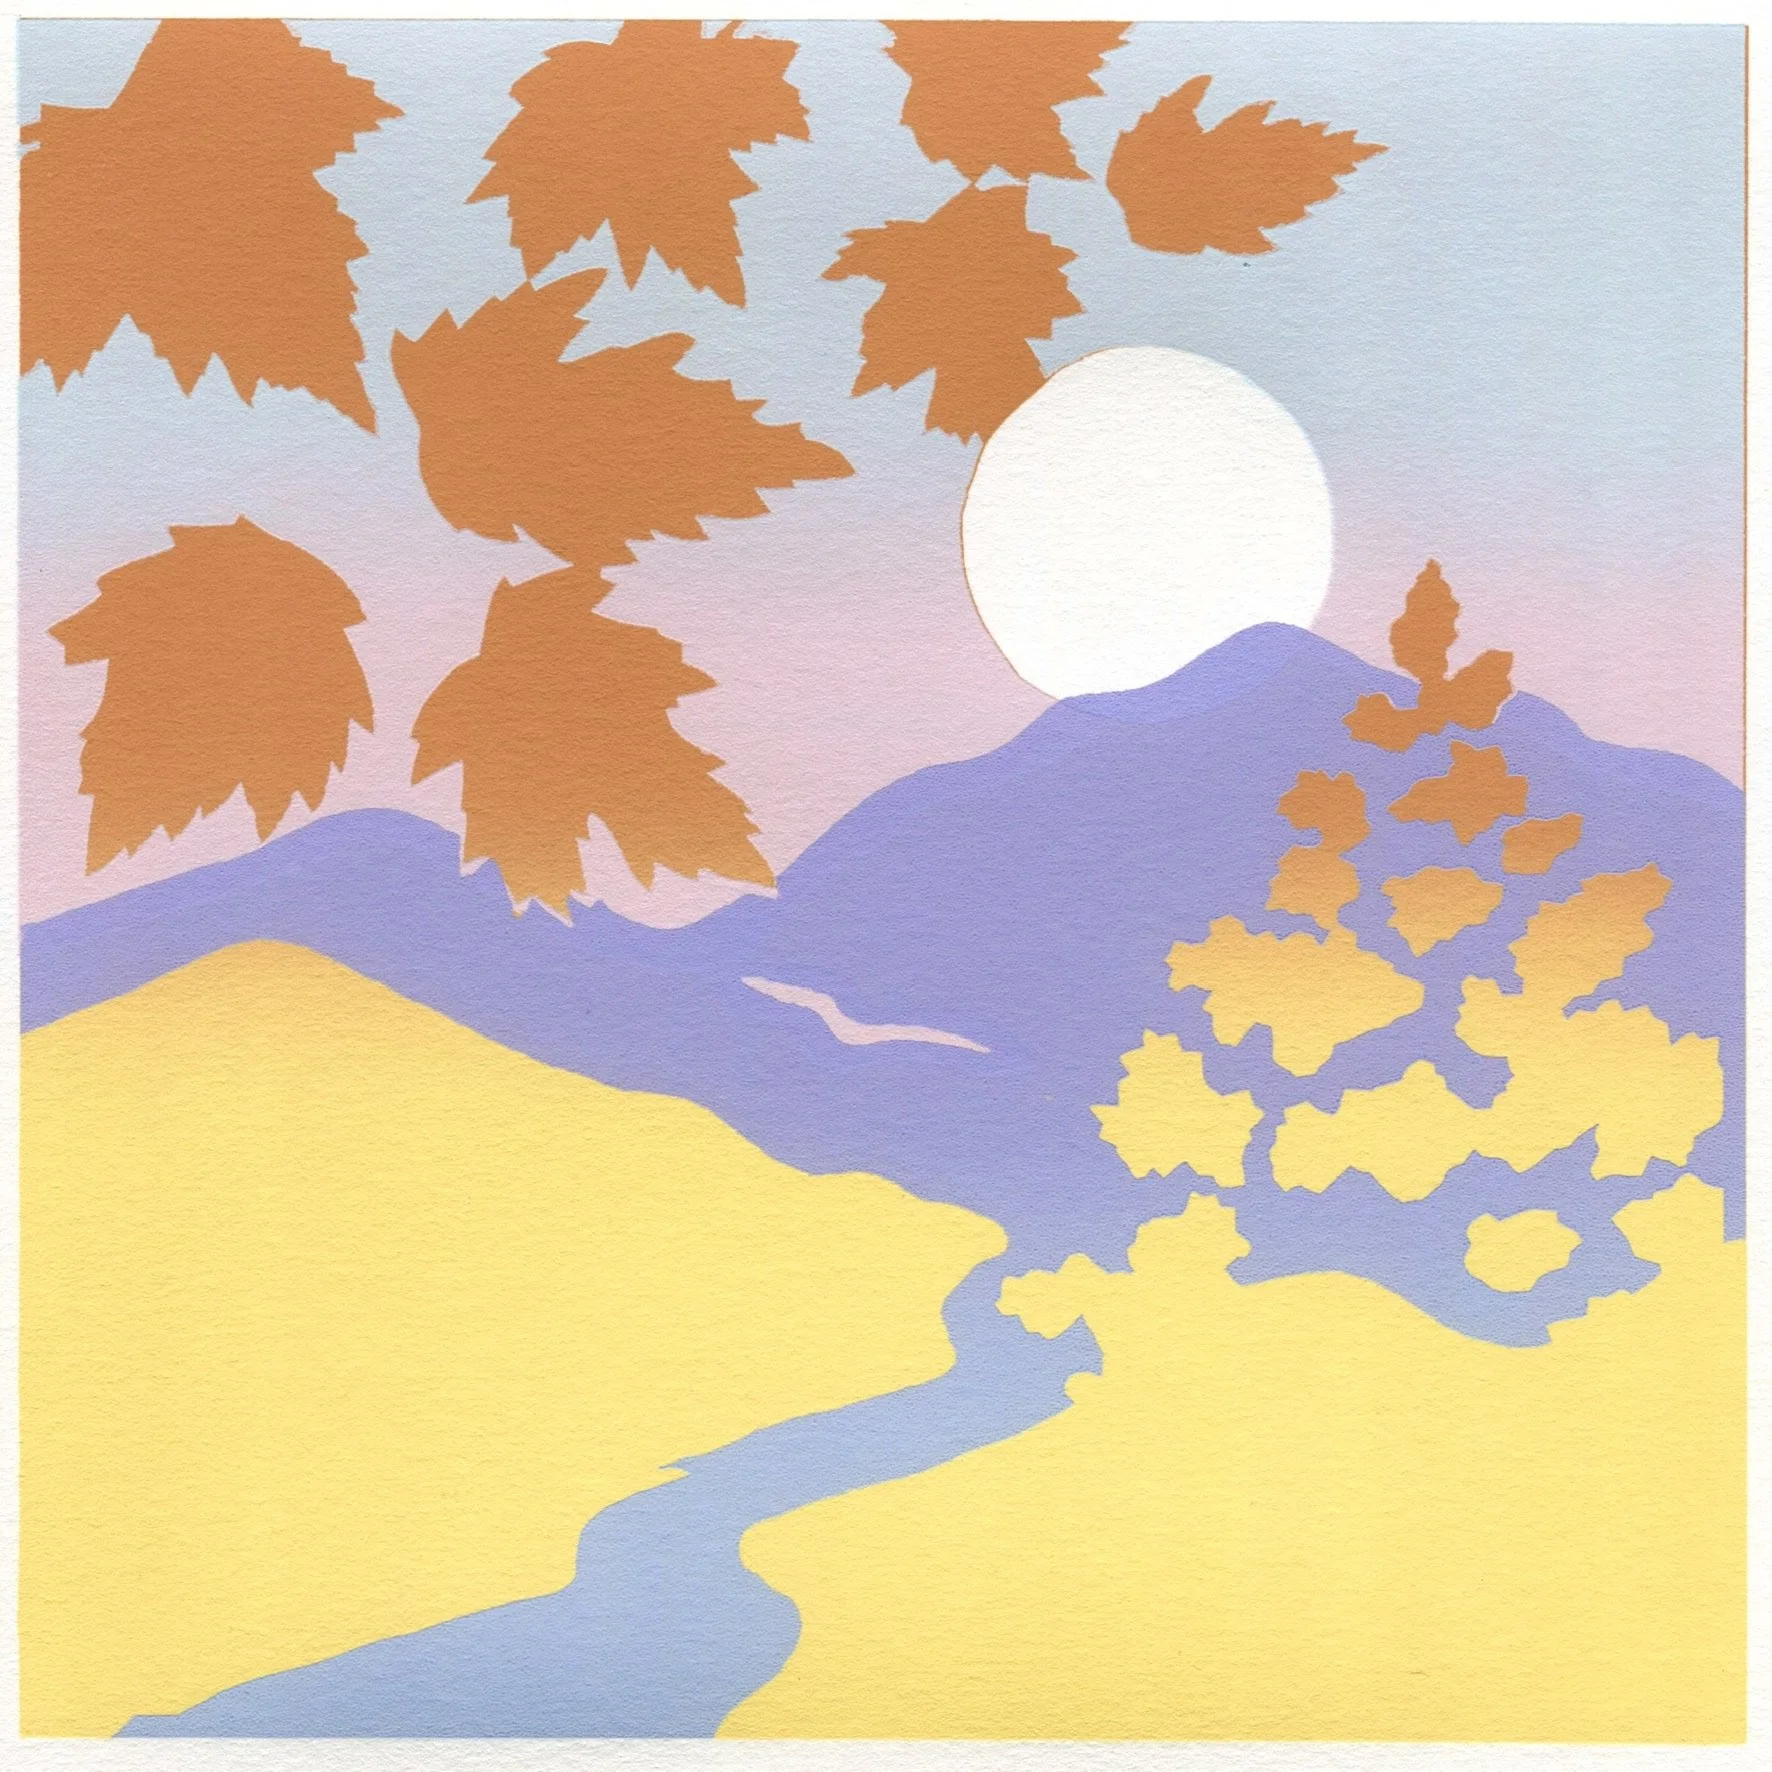
Third Color
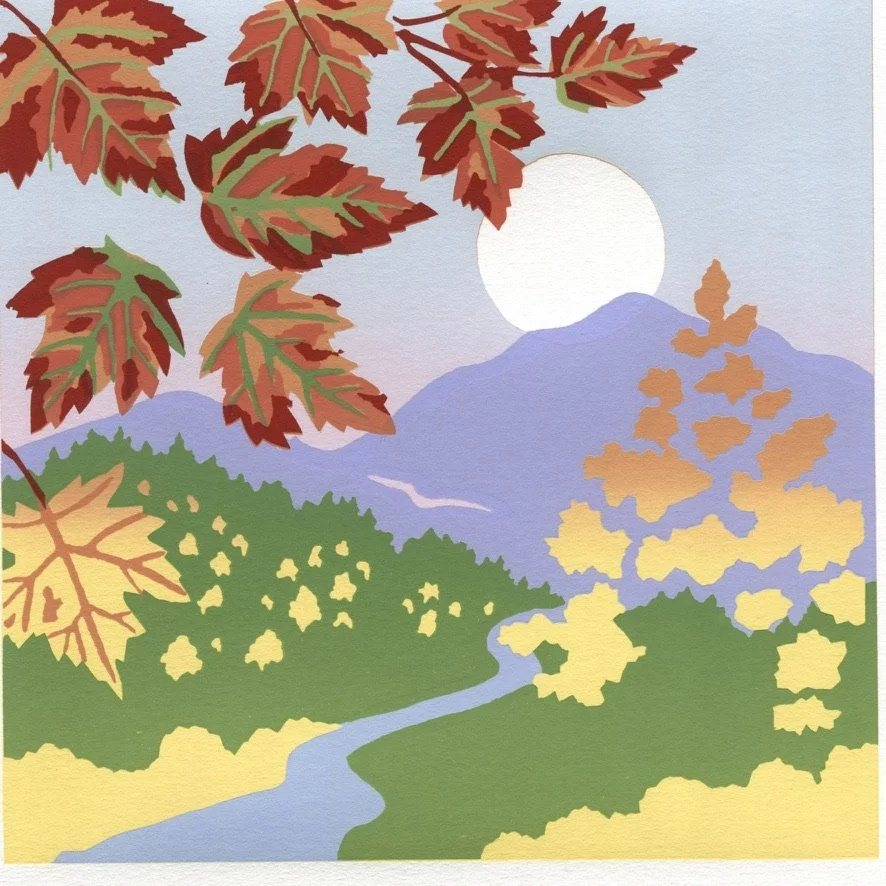
Fourth Color
Fifth Color
Sixth Color
Seventh Color
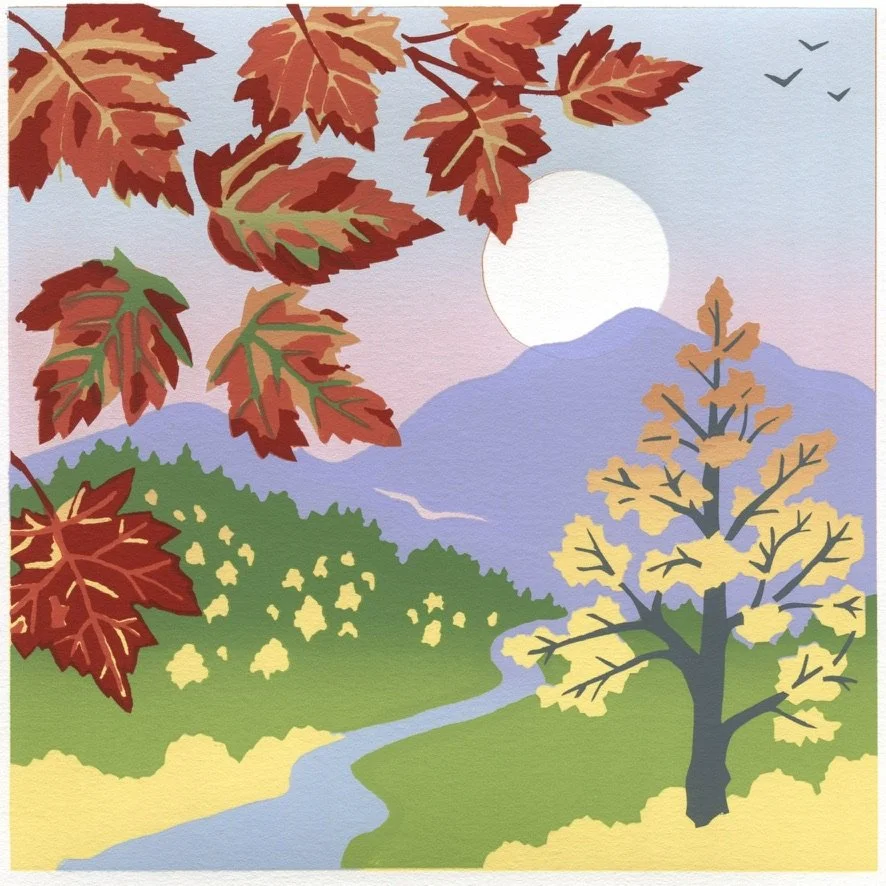
Eighth Color
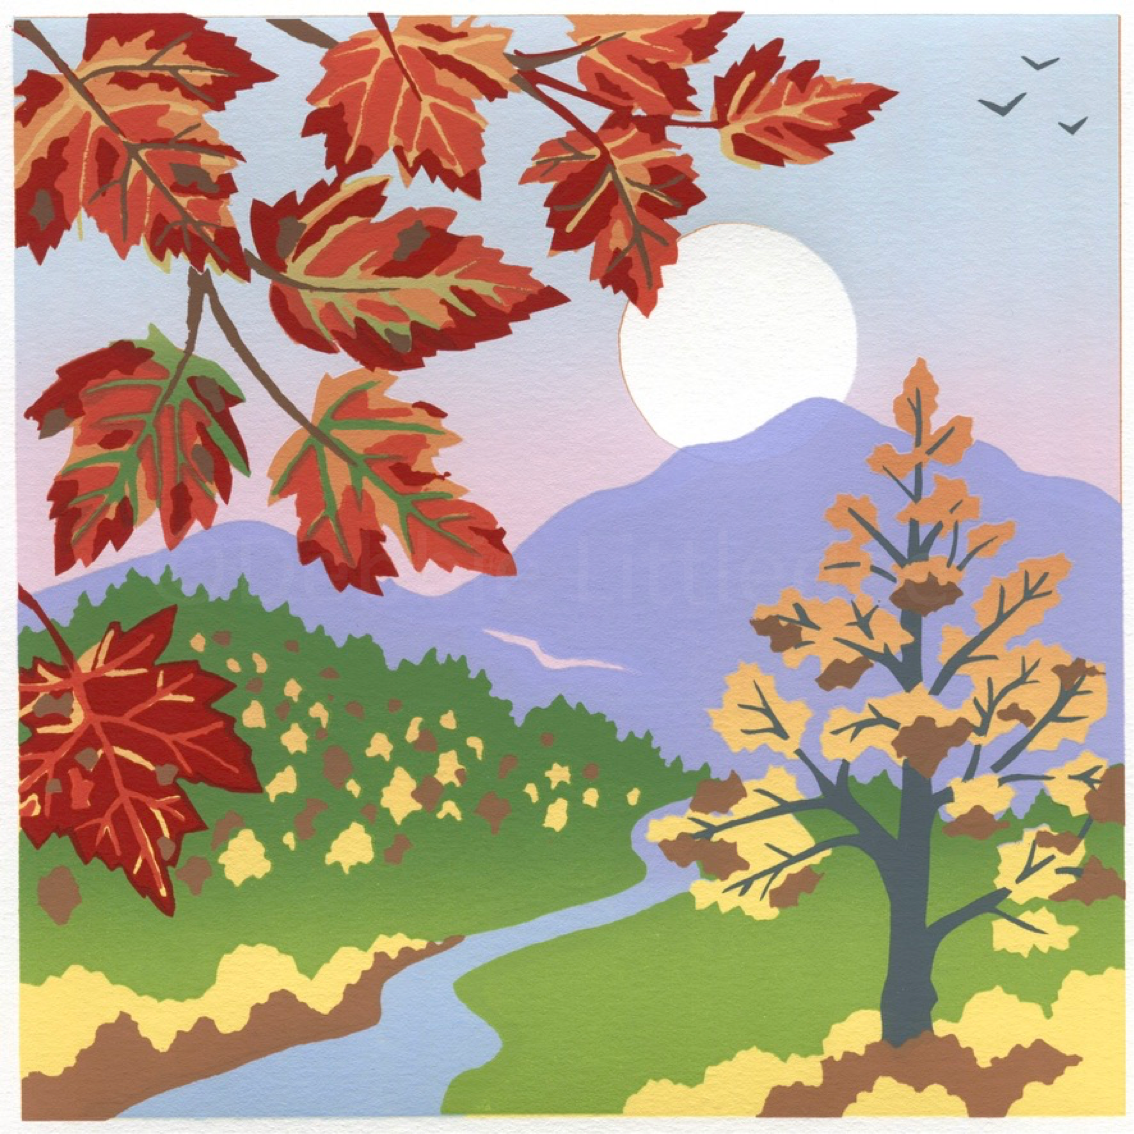
Finished Print
Inspiration and Design Creation
First, I hike, daydream, read, and look at photos for inspiration.
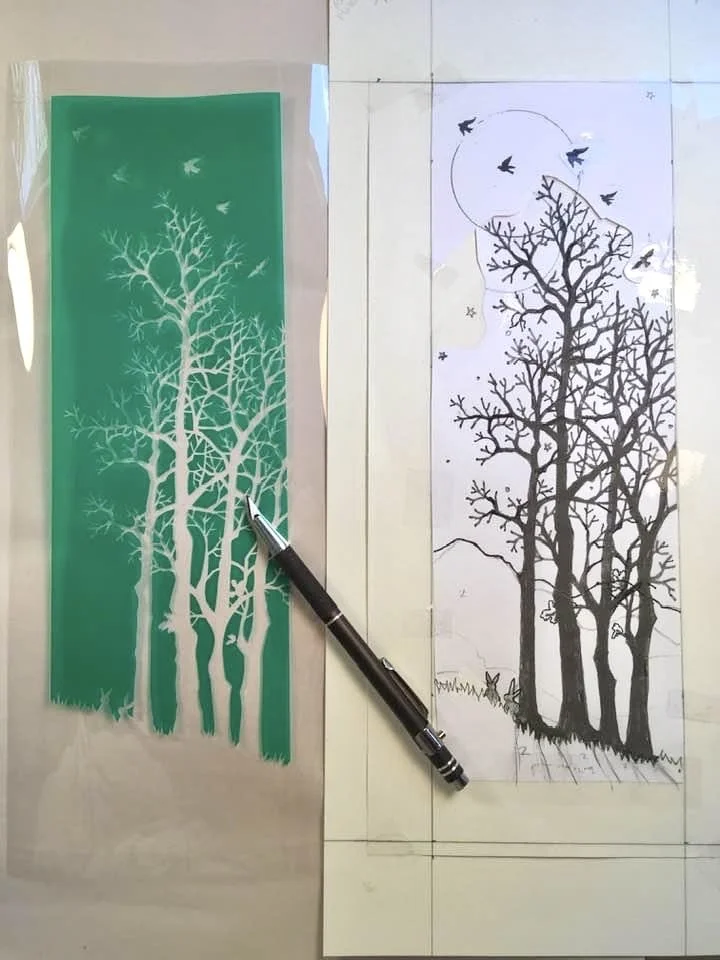
Next, I sketch my design, then I break it down into flat areas of color, usually anywhere from 3 to 15 layers of color.

Creating the Stencil
Stencils block off nonprinting areas and can be made and applied in a variety of ways. However, unlike many screen printers, I do not use a photo-sensitive emulsion.
The stencils I use are made of a thin lacquer film with an acetate backing. Each layer of color requires a different stencil and I hand-cut each using a small knife. First, I cut a piece of film and tape it over my master design. Then, I use a small knife to cut away areas where I want color to be printed, being careful not to cut through the acetate backing.
Why I don’t use an emulsion
Cutting stencils is my favorite part of the process!
Using an emulsion requires more space (racks for emulsion-coated screens, a darkroom, etc.)
My designs often include mountains, trees and stars, where I want to have sharp, well-defined edges, and I find that hand-cutting stencils works best for this
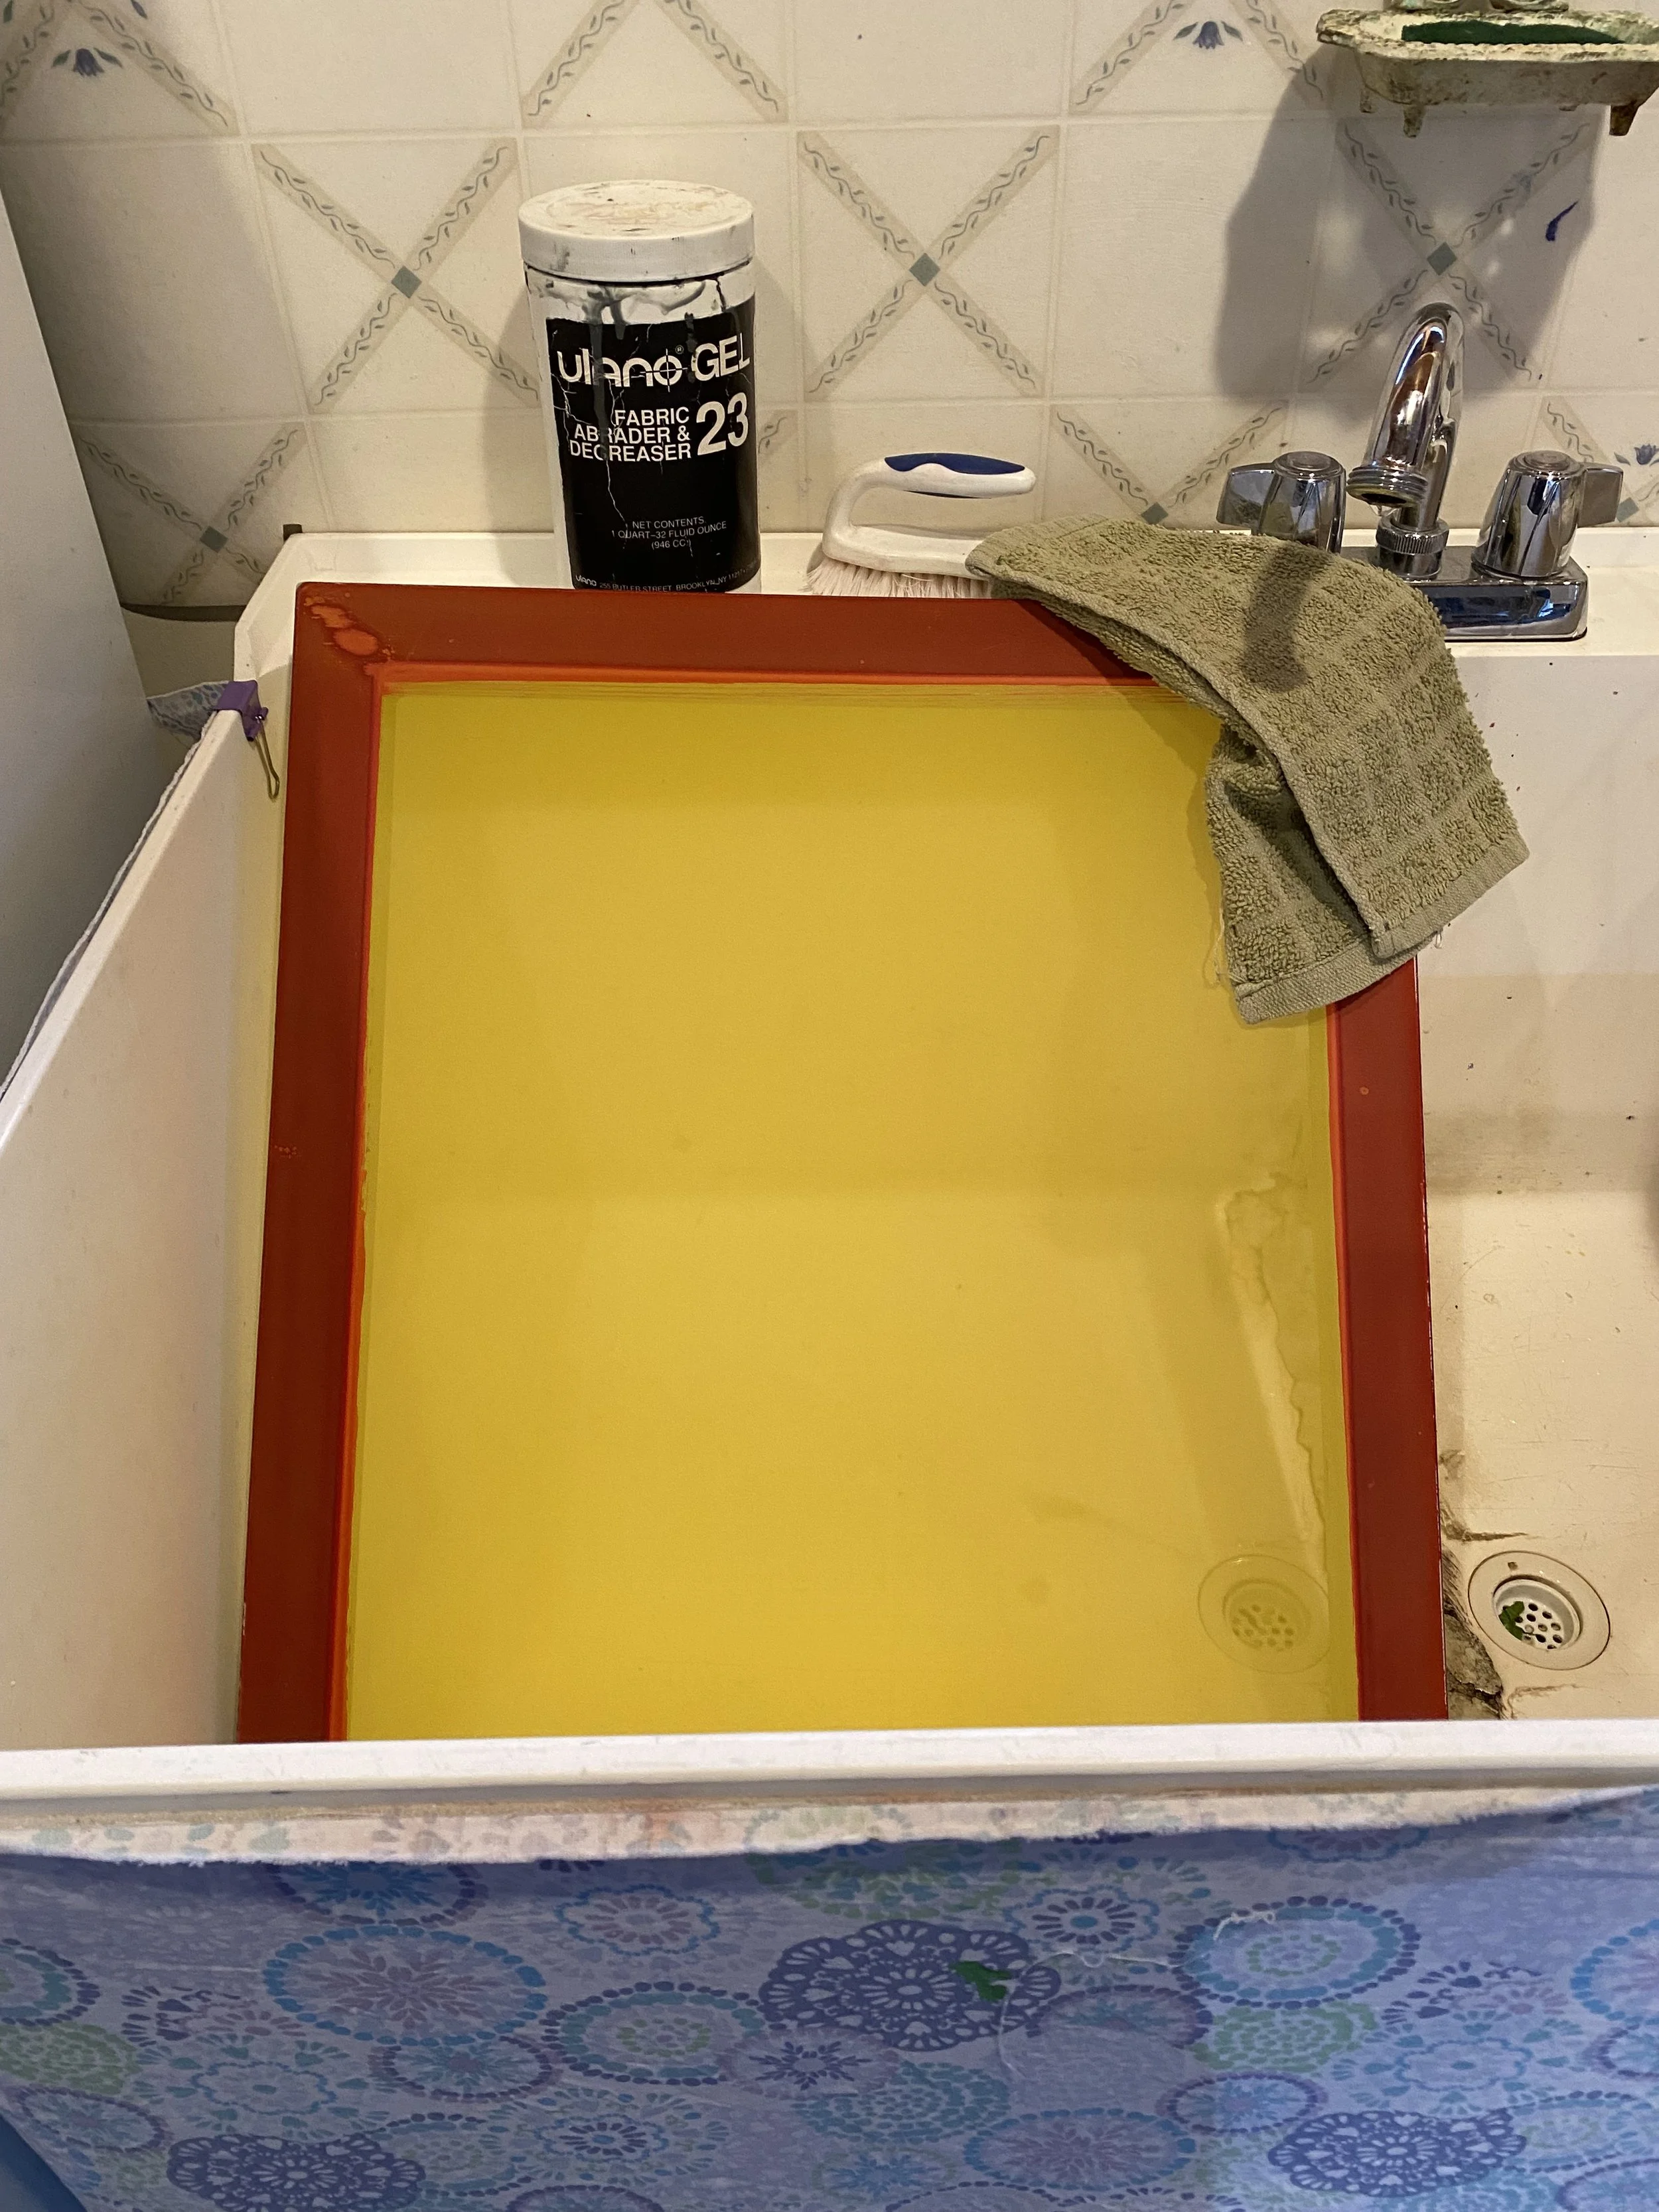
Prepping the Screen
As the name suggests, screen printing is a printing technique that uses a fine mesh fabric stretched over a wooden or metal frame, called a screen, to transfer ink to a surface below. Traditionally, screens were made of silk, but today they are more commonly made of man-made materials. The screens I use are monofilament polyester fabric with a mesh count of 200 threads per inch stretched over wooden or aluminum frames.
Before the stencil can be attached, the screen must be carefully prepped by:
Degreasing to remove any oily spots that would prevent adhesion, and
Abrading; roughening the screen to create more surface area so the stencil can better adhere
Paper
Having the right paper absorbency and texture is essential for printing. All of my prints have multiple layers of color so the paper must be able to absorb just the right amount of ink (too little absorbency and the ink bleeds out creating unclear lines while too much causes background layers to show through). The texture also needs to be smooth so colors print evenly.
I tried about 20 different papers to find the perfect blend of absorbency and smoothness. All of my prints are printed on Stonehenge paper, which is 100% cotton and acid-free. Stonehenge’s archival properties mean the paper is resistant to yellowing, fading, and deterioration, which helps preserve your print’s colors for years to come.
Mixing the Inks
To recreate the beautiful colors I see around me, I usually spend a whole day hand-mixing my inks. I use non-toxic acrylic inks, which contain no harsh chemicals or heavy metals and are healthier for me and the environment. I mix up jars of ink for each color in my design and test the colors by making several rough paintings.
Adhering the Stencil
Before printing can begin, the stencil must be attached to the screen.
I place my screen on top of the stencil (still with acetate backing) and weight the corners
I use a cloth to apply adhering fluid, applying gentle pressure to help adhere the stencil film to the screen so it stays in place during printing
I use a dry cloth to blot the stencil, removing any excess fluid
I let it dry, usually overnight
After the adhering fluid has dried, I peel the acetate backing off of the stencil film, leaving the stencil film attached to the screen
Registration
To ensure that the final prints match the original design, each stencil must be carefully registered.
First, I attach the screen (with the adhered stencil) to the printing table with clamps, creating a hinge that keeps the screen in the same place during printing. My printing table also has small holes allowing a vacuum to help hold the paper in place during printing.
Next, I place my master design on the printing table, carefully registering it with the stencil so that the master design is exactly in line with the stencil, ensuring that each layer of color will be printed in the correct place. I create a guide by taping registration clips along two perpendicular sides of the master design so I know where to place each piece of paper.

Printing
With the preparation work done, I can now begin printing the first layer of color.
I place the first sheet of paper on my printing table, fitting the corner into the registration guides, then, I lower the screen onto the paper.
Next, I spoon ink onto the top of the screen, then, take a squeegee and push down and pull across the screen, pushing ink through the stencil openings and onto the paper. I do this two or three times for each color to ensure that each layer of color is even and vibrant.
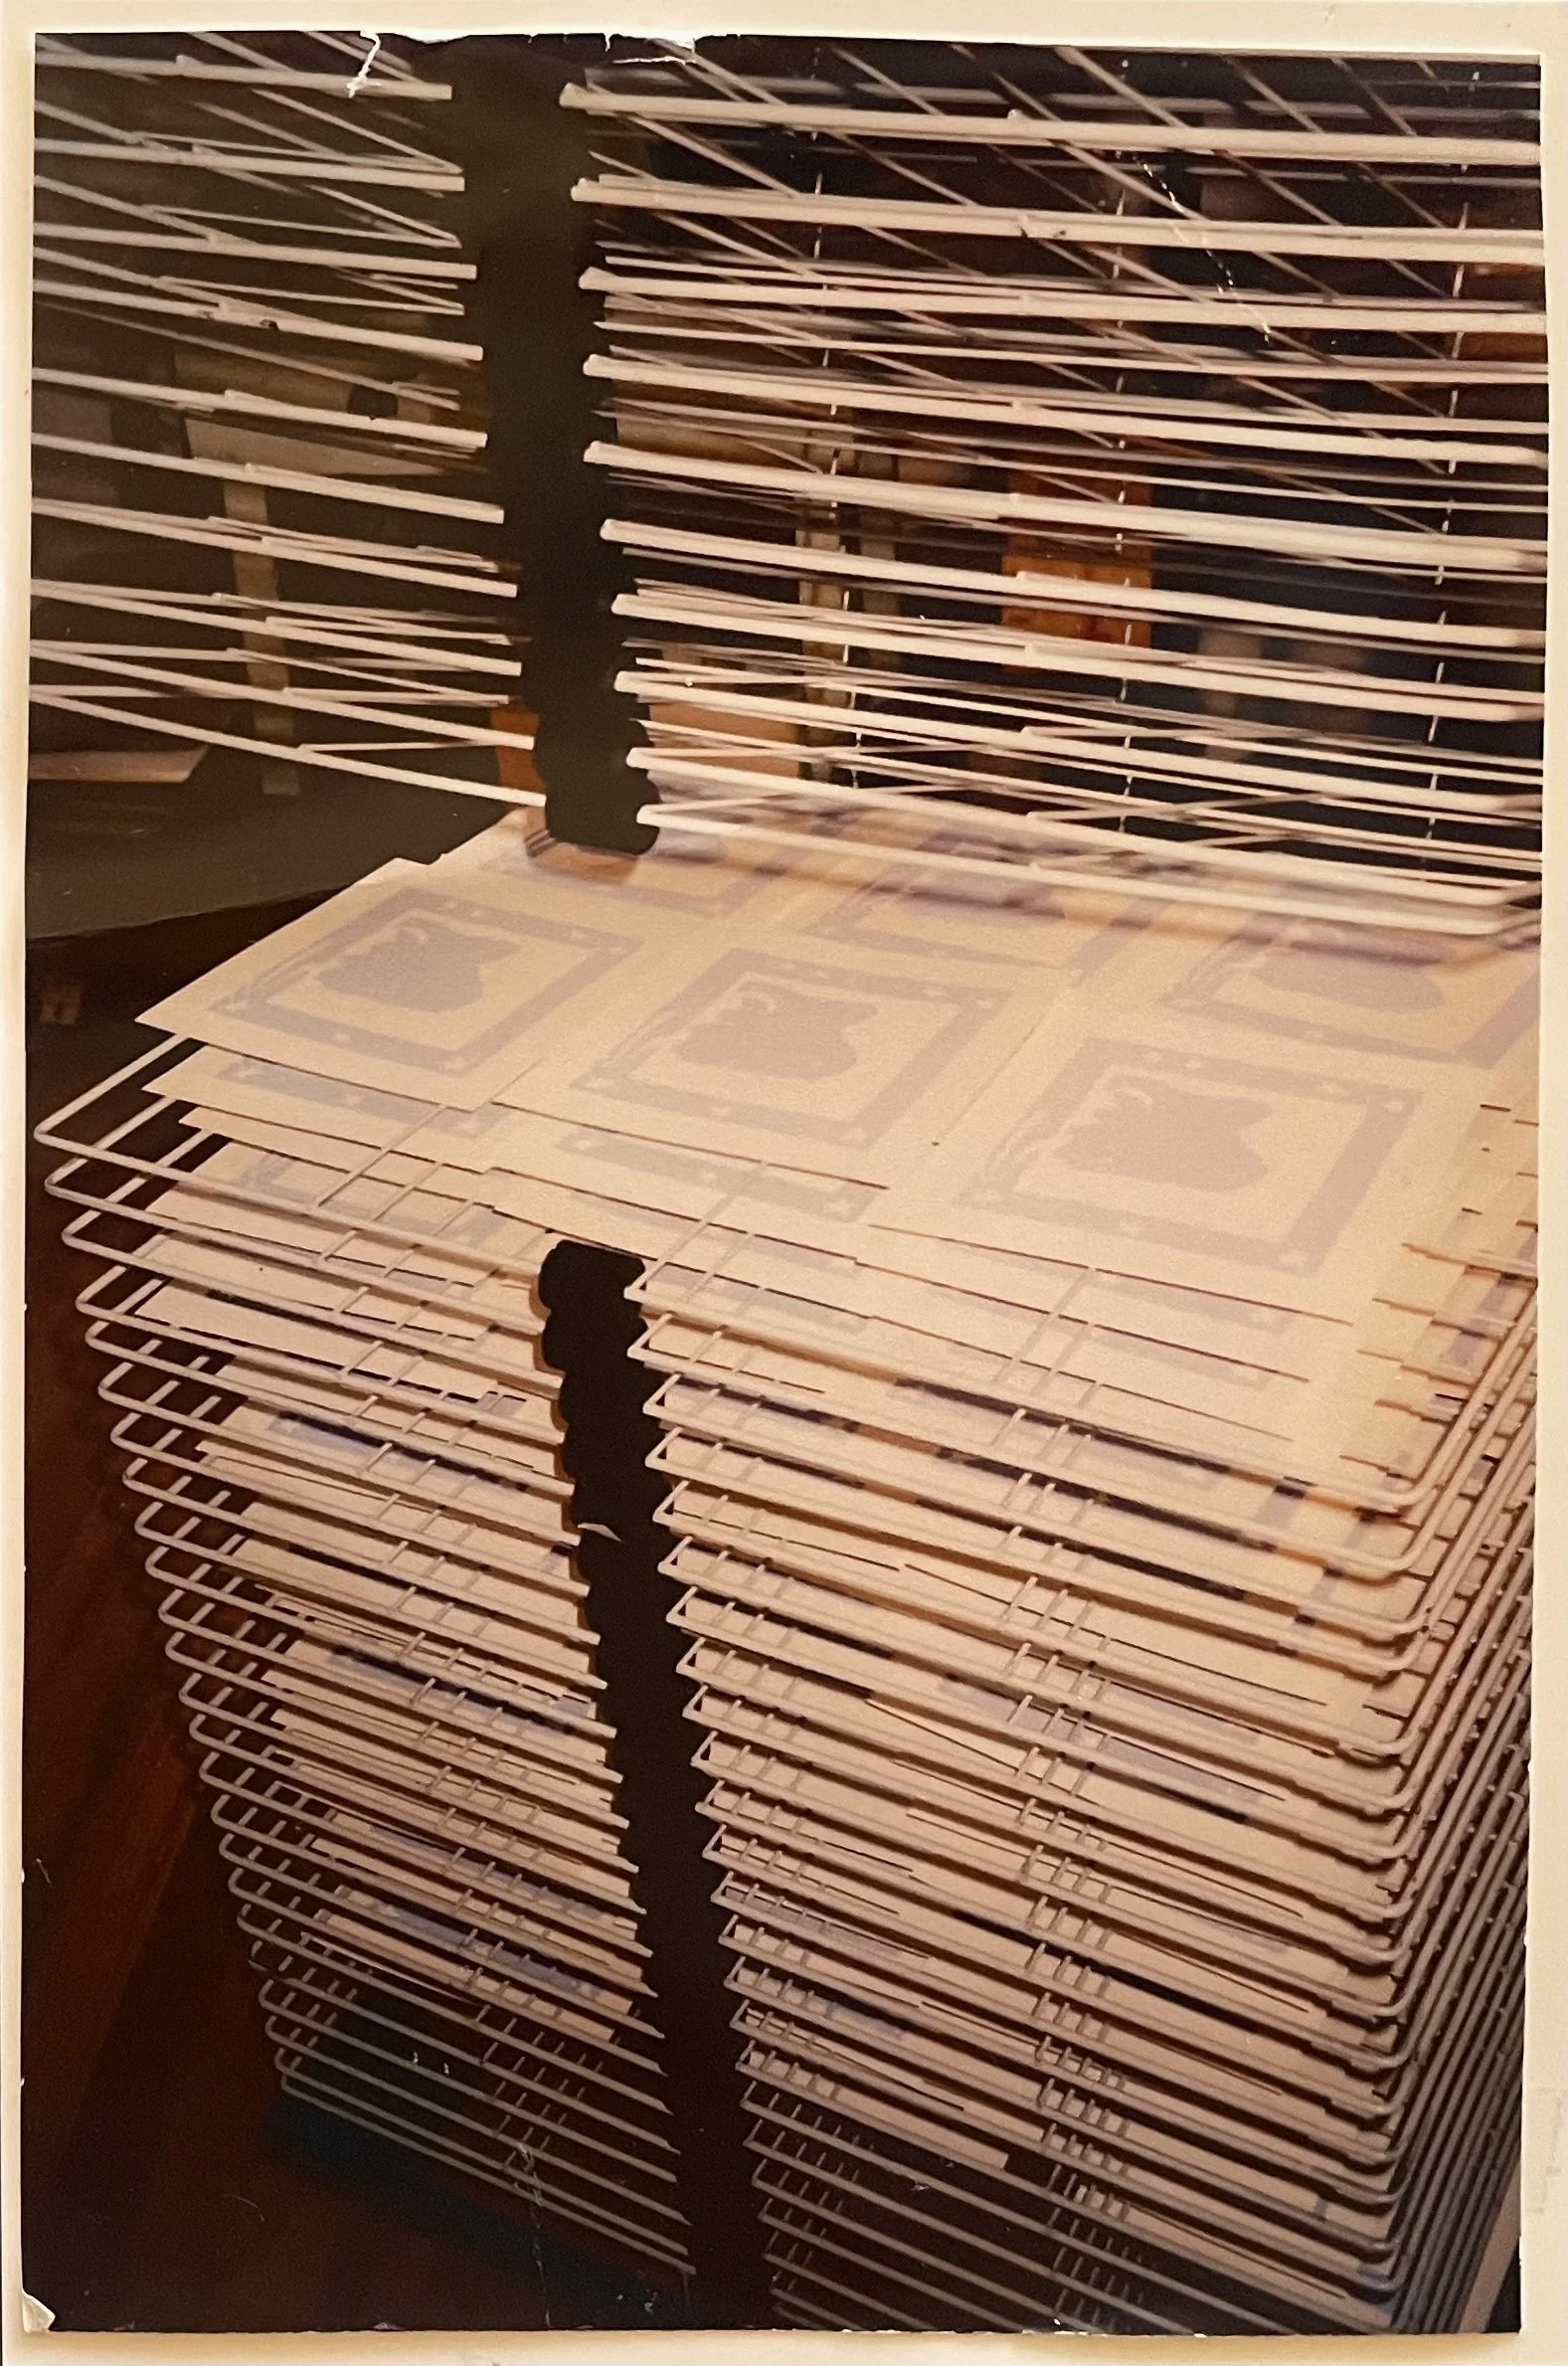
Finally, I lift the screen and move the printed sheet of paper to a drying rack. I then place the next sheet of paper and repeat the printing process for all prints in the edition (up to 200 prints).

Post-printing
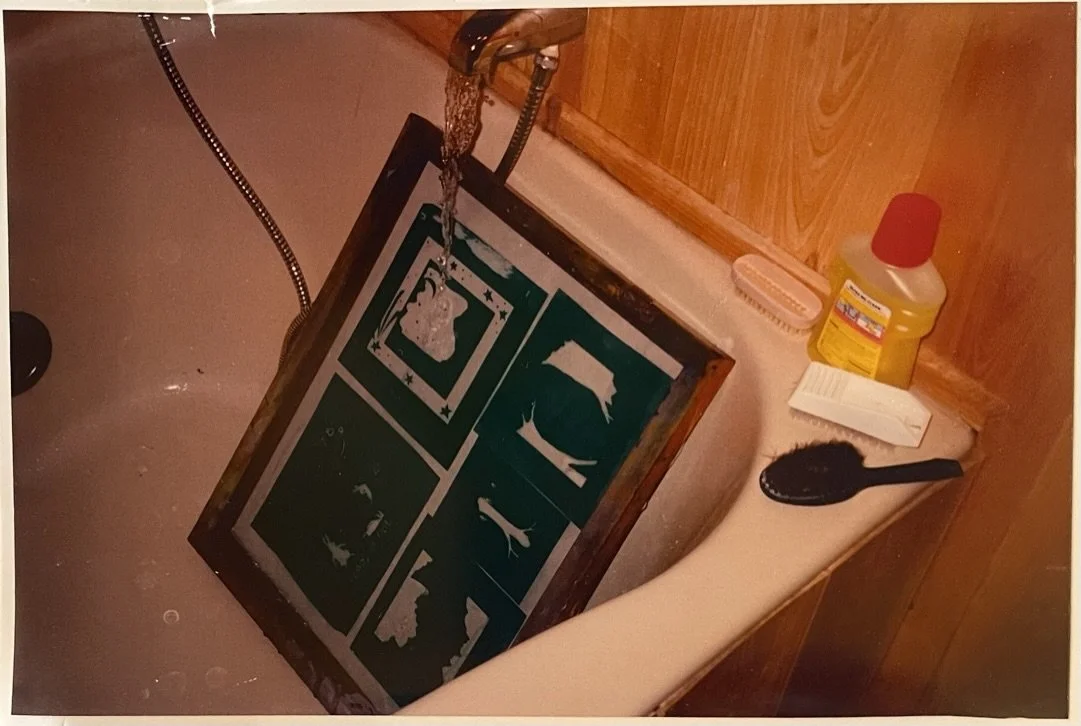
After printing all of the prints in the edition, I leave them to dry, usually overnight, then begin cleaning up. First, I remove my screen from the printing table, then I remove the stencil, being careful not to damage the screen, finally, I wash my screen with warm water and soap.
Unlike commercial screenprinting which reuses stencils for thousands of prints, I only print single-run editions, meaning there are a limited number of prints in the edition and only a single edition is produced. In fact, the process of removing the stencil destroys it so it can never be reused.
After cleaning up, I can start on the next layer of color. I take a new piece of lacquer film and hand-cut the stencil, making sure to cut away only where the next layer of color will go. I prepare my screen, adhere the stencil, register it with my master design, print all prints in the edition, clean up, then repeat for each layer of color in my design.
Creating a new print can take over a month, depending on the number of layers of color. For example, an edition of 200 prints with 10 layers of color takes up to a month to produce: from sketching the design to creating 10 different stencils to squeegeeing 400-600 times per color (4,000-6,000 times for the entire edition).
Final Touches
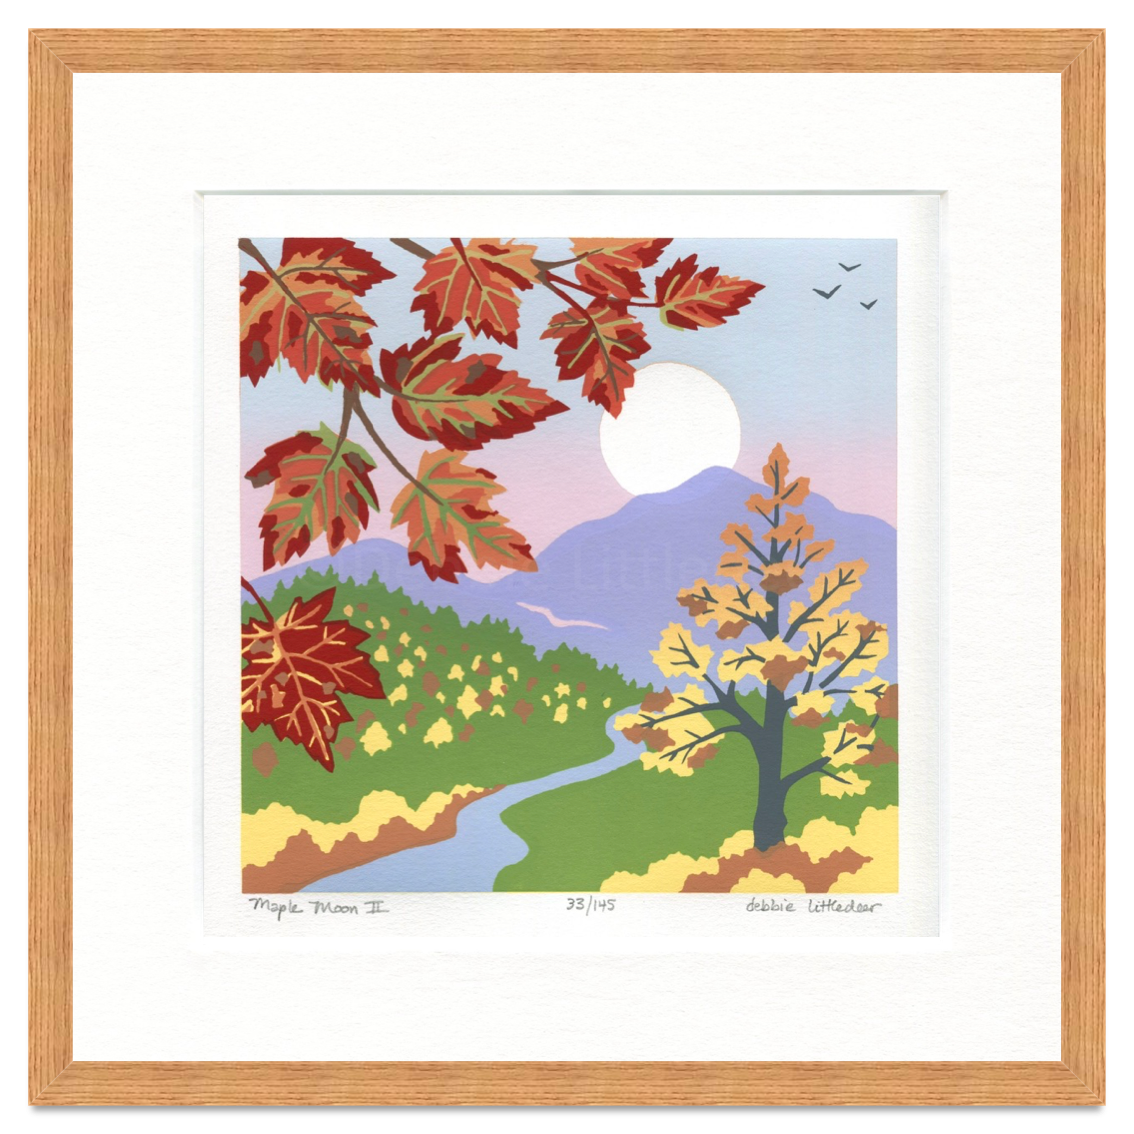
After printing the entire edition, I add any final touches such as hand-painting details and writing inscriptions around the borders, then I sign and number each print. Each print is given an edition number which is written as a fraction, for example, 18/100. The number on the right indicates the edition size, while the number on the left is the individual number for that print.
